The Form Wash is designed for the Form 2 3D printer from Formlabs to automate the cleaning process between printing parts. It makes things much easier for engineers who don’t want to waste any time cleaning their prototypes so they can either use the Form 2 again for another print job or get back to their next project.
Washing printed parts before post-curing helps to remove excess residual resin from part surfaces and cavities. Formlabs suggests using isopropyl alcohol (IPA) as the solvent that is most compatible with washing.
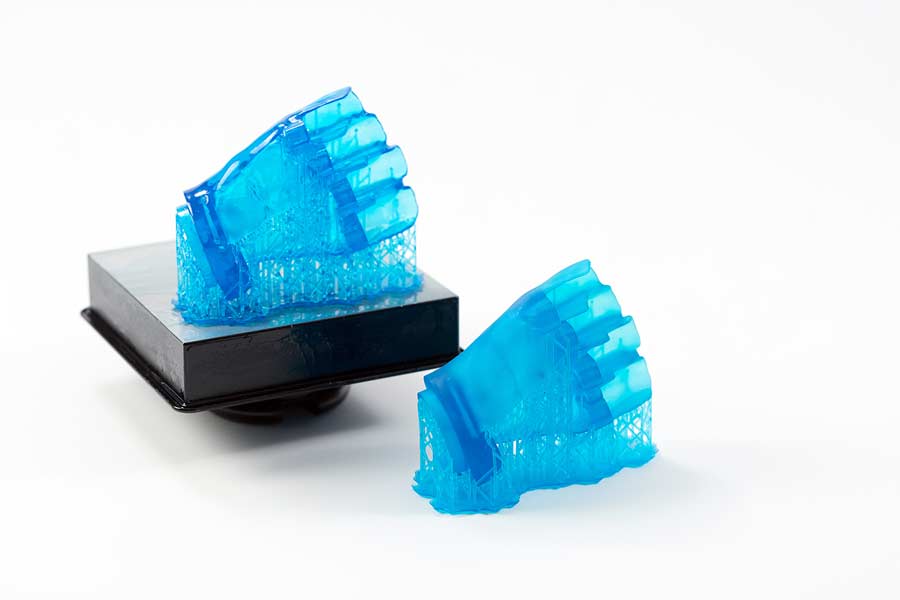
If you take a look at the image above, you can see that the left part is much cleaner and visually is more detailed than its counterpart. After using the Form Wash, you can typically use the Form Cure to expose printed parts to light and heat to stabilize the parts for performance. Using the Form Cure is not necessary but using the Form Wash and Form Cure together is recommended for optimal finishing.
Colder Products Company (CPC) has trusted EAC for years to provide them multiple Form 2 printers and other Formlabs equipment and materials to rapidly prototype customized quick disconnect couplings, fittings, and connectors for plastic tubing used around the globe. We answer a few questions that users have about the Form 2 and also include an engineer’s intake as well. Here is how Jeff Martin, an applications engineer at CPC, uses the Form Wash in-house to reduce time spent cleaning 3D printed parts.
How much time does it take for one wash?
Formlabs says that most resins require washing for the Form Wash default programmed time, which is 10 minutes – although additional time is needed for some resins. The following table shows Formlabs’ recommended wash times for each resin being used.
| Resin | Wash Time | Resin | Wash Time |
| Tough | 20 min | Elastic | 10 min + 10 min |
| Rigid | 15 min | Dental SG | 5 min |
| Grey Pro | 15 min | Dental LT Clear | 5 min |
| Castable | 10 min | Denture Teeth & Base | 10 min |
| Castable Wax | 10 min | Ceramic | 5 min |
| High Temp | 6 min | All other resins | 10 min |
Jeff suggests that you should set your wash time at 20 minutes for each wash. He also recommends that it’s best to physically have 2 Form Washes in-house to speed up the cleaning process, “The first Form Wash set to 10 minutes to wash parts hanging from the build platform, and the second Form Wash is used to clean the parts broken free from supports.” (Keep in mind, he typically uses Rigid Resin for his 3D prints).
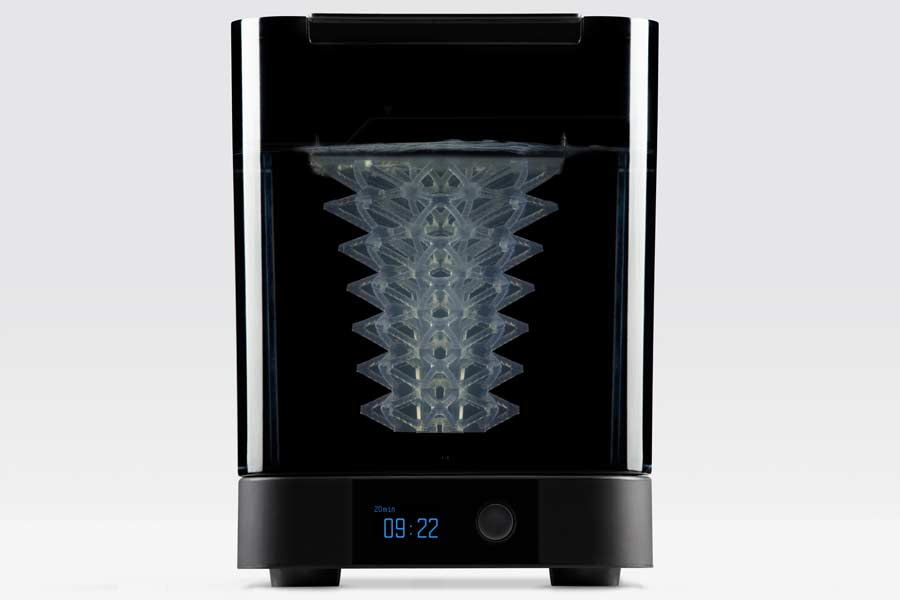
What’s the best way to wash prototypes?
If you’re using the Finishing Kit, Formlabs recommends that you should wash your prototypes in at least two standard wash tanks – the first wash, being the ‘dirty’ wash, would take 10 minutes and then the second wash, using a cleaner tank, for another 10 minutes. Once the first tank gets dirty, you can dispose the IPA, transfer the second tank into the first tank, and then pour new alcohol into the second tank.
The Finishing Kit includes 2 wash tubs to manually clean your 3D prints – whereas the Form Wash automatically cleans your parts and prototypes.
Jeff says the advantage of having a second Form Wash is that you can use Formlabs’ same theory of having a clean tank to do the final rinse. “I find it in my experience to be extremely useful to remove the supports for the second wash. The reason is that the supports block the fresh circulation of clean solvent from the parts. You will notice that for deep aspect bores and blind holes, if you do not remove the supports, they often times will not fully be cleaned of resin. After removing the supports and letting the parts bounce around in the basket during the last 10 minutes, they will always come out clean.”
Learn more FAQ by reading our related blog, “Everything You Need to Know About the Form 2 3D Printer.” If you’re interested in a free sample, then contact us at your earliest convenience.
Also, follow me on LinkedIn for tips and tricks on how to use the Form 2 and other equipment and materials from Formlabs!
You can now find the softest material for 3D printing, Formlabs’ Elastic Resin, and the most pliable of their library of Engineering Resins available to purchase through national commercial reseller EAC Product Development Solutions.
Request a free sample part to see how soft and silicone-like the Elastic Resin feels.
Elastic Resin
The Elastic Engineering Resin has a 50A Shore durometer material suitable for prototyping parts normally produced with silicone. This soft stereolithography (SLA) resin is highly elastic, yet strong enough that it doesn’t tear during the print job. Usually, these types of flexible prototypes have to be produced with mold making, but the Form 2 makes it possible to produce these models in a matter of hours in-house.
You can use Elastic Resin for parts that will bend, stretch, compress, and hold up to repeated cycles without tearing. Typical key applications for soft silicone and urethane parts include wearables and consumer goods prototyping; medical visual simulation and devices; compliant features for robotics; and special effects props and models.
This new resin is a long-lasting, tear-resistant, and made of resilient material that can withstand repeated use. It should be noted that soft 3D printing materials, in general, require denser support structures and attention to specific design guidelines before you print.
Real-use applications in various industries
Medical Industry: The Elastic Resin is translucent – a color ideal for medical visual applications and device prototyping. Anatomical simulation models, artery and vessel models, prototyping silicone parts.
“Elastic Resin’s opacity illuminates internal cavities well and its durability means that educators, trainees, and clinicians can handle and examine models without the worry of breakage. This material will be of particular interest to cardiovascular surgeons and interventional radiologists, as well as those conducting fluid dynamics studies and working in catheterization labs. It is relatively cost-effective when compared with other similar materials on the market, which can only help accelerate the adoption of 3D printing in medicine.” -Sanjay Prabhu, MBBS, FRCR; Pediatric Neuroradiologist and Clinical Director, SIMPeds3D, Boston Children’s Hospital
Engineering and Product Design: For those that are using Flexible Resin already, the Elastic Resin is a softer option for consumer product development. Prototyping silicone parts and seals, soft pads, grips, and ergonomic features, as well as sports eyewear.
Comparing the Elastic Resin to the Flexible V2 Resin for engineering and product design applications:
| Elastic | Flexible V2 | |
| Durometer | 50A: a soft flexible material | 80A: a hard flexible material |
| Elongation | High (160%) | Medium (80%) |
| Energy return/ spring back | High | Moderate |
| Tear Strength | Better (19.1 kN/m) | Prone to tearing (13.3 kN/m) |
| Reaction to compression | Good energy return/spring back | May break |
| Color | Translucent | Dark Grey |
Print resolutions: 100 microns only. Post-curing required. LT Tank Required. Good elongation (160%) and tear strength (19.1 kN/m). Wash time: 20 minutes. Cure time: 20 minutes at 60 °C.
Price: $199/L
Learn more about the Form 2 on our website. Or contact us about ordering the Elastic Resin.
Start Printing with the Form 2 3D Printer
The following is a case study pertaining to how CPC has used the desktop Form 2 3D Printer to transform the way they meet the demand of their customers.
If you want to start seeing results like CPC has, then contact us or request a free sample today.
Business Overview
Colder Products Company (CPC), founded in St.Paul, Minnesota in 1978, is a global provider and leader of quick disconnect couplings, fittings, and connectors for plastic tubing. They represent the fluid segment of their parent company, Dover Company. CPC designs and manufactures safe products and fluid systems in the following markets: life sciences, bioprocessing, thermal management, industrial, and chemical handling. CPC has produced over 10,500 custom and standard products to meet the fluid handling challenges of these industries worldwide.
Business Challenges
CPC understands the importance of custom manufacturing designs to meet customer needs. The need for custom parts can make design reviews a challenge. CPC knew the impact that physical prototypes have and how they could increase customer confidence in their designs.
Their options for producing a physical prototype were limited: a steep-priced PolyJet 3D printer used to print design prototypes in-house or outsourcing the prototypes to external vendors. Using a single in-house PolyJet was inefficient due to frequent repairs and maintenance and the difficulty of servicing and cleaning the machine. When outsourcing prototypes, it could take weeks to get a single part shipped.
Patrick Gerst, Vice President of Engineering at CPC, stated, “Our products are handled by people with their hands. The ergonomics of what it feels like when you connect and disconnect our product are all important parts of our brand and features. It’s all about getting customer feedback quickly. Being able to prototype has been a huge selling tool for us on the custom side of our business.”
When using the in-house PolyJet or outsourcing the prototype wasn’t an option, the engineers relied on 3D-rendered computer-aided design (CAD) models to present concepts and receive feedback early on through web meetings. It was a challenge for CPC to convey the size and scale of their designs to their customers behind a computer screen. The need for reduced design cycle time, a more cost-efficient solution, and an accurate portrayal of their concepts and designs were crucial for a better development process and higher customer satisfaction.
Solutions
CPC knew that physical prototypes played a critical role in their development process and customer satisfaction. Jeff Martin, an Applications Engineer at CPC, stated, “Being able to get prototypes in customers hands helps keep their interests piqued. It just keeps the excitement level there.” The mission was to find an affordable 3D printer that required little maintenance and delivered fast turnaround for their increasing requests for customized parts.
CPC compared and evaluated the quality and cost of 3D printers from nationwide and local manufacturers. EAC Product Development Solutions, a local value-added commercial Formlabs reseller, worked with CPC to showcase the Form 2 and its outstanding print capabilities. Martin says, “We evaluated everything from the really large, expensive industrial machines that were over $100,000 to desktop 3D printers. We found that the Form 2 could print the parts equivalently for our needs.”
Results
The Form 2 is a revolutionary stereolithography (SLA) desktop 3D printer used to create models, prototypes, and production parts. The 3D printer has the capability to print at high resolution which allows small, detailed features to be generated with precision – which is exactly what CPC needs for its manufactured parts. The Form 2 is priced as low as $3,499. The affordability of the 3D printer allowed CPC to purchase three Form 2 printers from EAC within 18 months. Purchasing three Form 2’s was $85,000 less than one large industrial printer.
Gerst says, “It was more expensive to maintain our PolyJet than to just buy a few Form 2 printers. If we had a service call, it would cost us a few thousand dollars… It made sense to start going towards these machines.” Compared to the use of one PolyJet, the three Form 2 printers provide a 100% uptime because there is always at least one printer available for a project at all times.
Before the adoption of the Form 2, outsourcing parts slowed down the early design stages for each project. One of their engineers said, “When we only had external resources making our parts, it used to be a rarity that we would buy 3D printed parts. Once a month we would buy some parts at the end of a design cycle and we would have to wait at least a week before we would have anything.” The Form 2 printer allows CPC’s engineers to get a physical prototype in their hands 80-97% faster than if they were to outsource to a service bureau.
“We’re all about iterating and prototyping quickly to learn as much as we can with each iteration. Having multiple in-house Form 2 printers has really helped us accelerate our design time. I don’t think that I’ve ever walked into our design lab and seen all three sitting idle. They run all the time. Now we present prototypes more frequently to customers than we used to,” Gerst stated. With all three printers running continuously, the Form 2 reduces CPC’s design iteration time by up to 80%. Overall, customer satisfaction rates increased due to the quick turnaround time for printed parts from the Form 2 SLA desktop 3D printer.
Have more questions? Here’s everything you need to know about the Form 2 3D Printer.
You asked we answered. Check out what makes the Form 2 3D Printer the best SLA 3D printer on the market.
What’s the difference between the Form 2 3D printer and a filament printer?
FDM or FFM (fused deposition and fused filament) 3D printers melt a plastic filament, whereas the Form 2 uses a liquid photopolymer resin which is cured with a UV laser.
What makes the Form 2 printer better than a filament (FDM) printer?
The Form 2 3D printer can achieve a much finer X, Y, and Z accuracy than most FDM printers because it does not extrude a thick bead of hot plastic onto the build platform. The Formlabs Fo allows the 3D printer to create dense, isotropic parts with greater strength, smoothness, and detail.
How much calibration does the Form 2 require?
Virtually none. Formlabs’ factory calibration rig ensures that printers are fully calibrated. You do not need to do any tray-leveling. The printer is ready to print within 10 minutes of unboxing.
What is the X/Y accuracy on the Form 2 Formlabs 3D Printer?
The Form 2 printer has an accuracy as fine as .002” or 0.050 mm.
What is the tolerance and fit of Formlabs Form 2 Printer?
You can read all about the Formlabs Form 2 tolerance and fit on this accuracy, precision and tolerance in 3D printing guide.
What is the resolution of the Form 2 printer?
The Formlabs Form 2 3D printer is not an FDM printer, therefore resolution doesn’t pertain to the printer itself. What may be most helpful for you about the Form 2 is the laser spot size, z-axis layer height and the layer thickness (all mentioned in the next few questions below).
What is the Form 2 laser spot size?
The Formlabs Form 2 Laser spot size is 140 microns.
What is the Form 2 3d Printer layer thickness?
The Form 2 has a layer thickness of 25, 50, and 100 microns.
What is the minimum feature size of the Form 2 Formlabs 3D Printer?
The Form 2 has a 150µm minimum feature size.
How big can you print on the Form 2?
The Form 2 build volume is 145 mm x 145mm x175mm (5.7” x 5.7” x 6.9”).
What Form 2 materials can you use with the 3D printer?
The Form 2 3D printer has many standard resins options as well as engineering resins that deliver specific material properties. You can use standard resins that are available in clear, grey, black, and white. The Form 2 also has functional resins that are ideal for a wide range of applications.
The Form 2 flexible resin is ideal for prototyping functional grips, seals, and soft robotics.
The Formlabs tough resin is a durable and impact-resistant material for sturdy engineering prototypes. The Form 2 castable resin material is a great for printing detailed jewelry models that can be burned out in investment casting. The Formlabs Dental SG resin material is a Class I Biocompatible material suitable for printing surgical guides.
What Formlabs Dental resins are available?
There are a few different Formlabs dental resins available for a range of applications. The Form 2 Dental Model Resin is designed for crown and bridge models with removable dies. It is a very high accuracy resin with a smooth matte finish. The Dental SG Formlabs resin is Class 1 biocompatible and is designed for printing surgical guides. The Dental LT Clear Formlabs resin is Class IIa long-term biocompatible and is designed for splints, retainers, and other direct-printed long-term orthodontic applications.
Will the resin harden on the Form 2 3D Printer and how does that work?
The Formlabs resin contains a photo initiator which when activated causes short chain monomers and oligomers to bind together into long-chain polymers which cause the resin to solidify.
How many prints can you get on the Formlabs Form 2 3D printer from 1 liter of resin?
Our standard rook uses about 11ml of resin, so you could get about 90 3D prints from 1L of resin.
What do I do with unused resin after I finish a print job on the Form 2 3D Printer?
Resin left in the Form 2 tank after a print job should stay in the tank. It does not need to be poured back into the cartridge.
What is the shelf life of the Form 2 resin materials?
If the Formlabs resin materials are stored within the cartridge, the resin has a shelf life of about a year, and if stored within the light-blocking resin tank it can be stored safely for about 2-3 months.
How does finishing work on the Form 2 by Formlabs?
When a 3D print from the Form 2 is finished, there is a thin layer of uncured resin which needs to be washed off. When the print is complete, simply soak the part in a bath of isopropyl alcohol for about 15-20 minutes to wash off the uncured resin.
Why do I need the Form Wash and Form Cure units?
When you remove a part from the Form 2 printer there will be a thin layer of uncured resin that you’ll need to rinse off. The FormWash unit uses an impeller to agitate Isopropyl alcohol to get your part clean (see attached FormWash guide -called wash and cure sell sheet). The FormCure unit cures the part to bring it to its maximum mechanical properties. See guide (attached as How mechanical properties of SLA 3D prints are affected by UV curing)
What is the recommended Formlabs cure time?
This all depends on your design. Check out our guide on post-curing with the FormCure for specifics.
How do I get a free Formlabs sample?
See the quality of a Formlabs Form 2 3D prints for yourself. You can request a free Form 2 3D printed sample here.
What maintenance does the Form 2 3D Printer machine require?
The Form 2 requires very little maintenance. The calibration process is done at the factory. The resin tank is a consumable component which will eventually need to be replaced after about 2L of prints. The resin tank costs $60 to replace.
What is the difference between laser SLA and DLP?
Laser SLA printing uses a round laser point to trace out the area to be solidified in each layer. DLP projects a single image of each layer, composed of rectangular pixels, in a flash of light. DLP pros: smaller minimum exposure size, faster prints. DLP cons: build volume is constrained by x/y resolution; projector bulbs are consumable and need to be replaced; pixels lead to voxelization/aliasing error in x/y plane. Also, the Form 2 has a much smaller footprint than most DLP printers and can fit more comfortably in most workspaces.
Why should I consider a Formlabs Form 2 3D printer if I’m already using a Stratasys or an Objet printer?
We’ve found that Form 2 is much less expensive to operate than larger-volume printers, and usually fits nicely within most workflows. This is exactly why we decided to partner with Formlabs adding their 3D printers into our product line. Even if you’re happy with your Stratasys or Objet printer, you may find that using the Form 2 for prototyping smaller parts will save you money in the long term by reducing the operating time and materials cost on your larger machine, while producing parts of a similar quality.
The technology behind most resin 3D prints is referred to as stereolithography (SLA). The additive manufacturing technology converts liquid materials into solid parts by curing each layer with a light source in a process called vat photopolymerization. The light source is usually a UV laser or projector that cures the liquid resin into hardened plastic. SLA printing is considered to be one of the most widely used techniques in producing high-quality 3D prints such as models, prototypes, and production parts.
Why choose a desktop SLA printer?
The closed build environment and heated resin tank provides consistent conditions and better accuracy for each print. SLA creates parts with a smooth surface finish as soon as it’s done printing which is ideal for applications that require a flawless finish. It helps reduce finishing time as well since the parts can be easily sanded, polished, and painted. The smallest detail is much finer on SLA printers due to the 140 micron laser spot size on the Form 2 compared to 350 microns on industrial SLS printers and 250-800 microns on FDM machines.
In-house 3D printing can reduce costs by 50-90% when factoring in consumables, maintenance, labor, and depreciation of the machine. There is a turnaround time of hours instead of days or weeks with outsourced production. Desktop SLA 3D printers allow for accurate prototypes, rapid iterations, and earlier discovery of errors which all lead to better final results.
Formlabs – ‘Form 2’ Desktop SLA 3D printer
The Form 2 delivers high-resolution SLA prints that are significantly smoother and more detailed than other plastic 3D printing technologies. It enables you to print precise models with a smooth surface finish and helps save time and money during the design and manufacturing process.
Automated Resin Refill
Level sensing ensures your tank is automatically filled during printing. No more pausing for manual refills.
Resin Cartridge Recognition
The Form 2 automatically recognizes the resin type, configures settings, and allows you to keep track of resin supplies from your Dashboard.
Open Mode
Experiment with non-standard applications such as embedding objects in prints, creating lithopanes, and etching PCBs. It enables support with 3rd party resins.
Form 2 – SLA materials for different industries
Every industry has specific needs and applications for 3D printing. The stereolithography materials selection for desktop SLA 3D printers are built to address these varying needs of design and engineering groups.
Standard
Standard resins are ideal for rapid prototyping, product development, and general modeling applications. The resin provides high resolution, fine features, and a smooth surface finish and doesn’t require post-curing. The resins are available in greyscale, clear, white, and a color kit.
Engineering
Engineering resins are used to create functional parts for anything from assemblies to injection molds and have tough, durable, flexible, and temperature-resistant characteristics. They are used to simulate a range of injection-molded plastics to help designers and engineers conceptualize, prototype, and test final products.
Dental
Dental materials have specific applications that include orthodontic models, splints, retainers, diagnostic, biocompatible surgical guides, and educational models. These resins allow dental labs and practices to create a range of dental products in-house based on a patient’s intraoral scan or CBCT scan.
Jewelry
Jewelry prototypes can be made with SLA technology to create a fitting ring or try on piece. Castable resin is designed for direct investment casting to allow jewelers and casting houses to view the 3D print in-house or to create custom jewelry cost effectively.
Learn more about the Form 2 3D printer here or request a sample part here.
This is a guest post from our friends over on the Formlabs Blog.
What do Formula 1 race cars and Marine One have in common? Many of their high-performance drivetrain and engine components started life in Kapfenberg, a quiet little town nestled in the Austrian Alps.
Pankl Racing Systems specializes in developing and manufacturing engine and drivetrain components for racing cars, high-performance vehicles, and aerospace applications with more than 1,500 employees, and worldwide subsidiaries in Austria, Germany, the United Kingdom, the United States, Slovakia, and Japan.
Every single part that Pankl makes requires a series of custom jigs, fixtures and other tooling that are designed and fabricated specifically for that part. The result is a proliferation of custom tools, adding significant cost and complexity to the manufacturing process.
To fulfill tight production deadlines, process engineer Christian Joebstl and his team introduced stereolithography (SLA) 3D printing to produce custom jigs and other low-volume parts directly for their manufacturing line in the company’s new €36 million state-of-the-art manufacturing facility.
While 3D printing was initially met with skepticism, it turned out to be an ideal substitute to machining a variety of these tools, surprising even Pankl’s demanding engineers. In one case, it reduced lead time for jigs by 90 percent–from two to three weeks to less than a day – and decreased costs by 80-90 percent, leading to $150,000 in savings. Read on to learn how Joebstl and his team implemented their new 3D printing-based process.
Custom jigs in-use for motorcycle gear manufacturing
Pankl has been in the business for more than 30 years. Has 3D printing been a long-standing part of your practice?
Surprisingly, not at all. We didn’t have any 3D printers until less than a year ago. A colleague of mine had a request for a custom cover to hide some areas from impact in a shot peening machine. We used to buy parts like this from an external supplier, and one such tooling cost about €1,200. I was thinking ‘there has to be another way.’
Having been familiar with 3D printing from my education, I started looking and found the Form 2 3D printer after reading some reviews online. My colleagues understand the value in 3D printing now, but at the beginning, they were extremely skeptical. They thought 3D printing was more like a toy.
In our business, we expect that good equipment is inevitably also expensive. Most of our machinery starts at $100,000 and goes well beyond that. When my colleagues saw that the Form 2 only costs about $3,500, they asked me, “Why should we buy a toy?”
We ordered multiple custom sample parts to conduct tests, and it turned out that the 3D printed parts were capable. Holes and length tolerances were within the ±0.1 mm interval. I researched the material costs for my amortization calculation and discovered that a 3D printed set of the tooling for shot peening would only cost $45. I summarized this into a presentation for the board and took the parts to the kickoff meeting of the new gear plant. They were finally convinced, and we decided to buy our first Form 2, which we soon scaled up to three units.
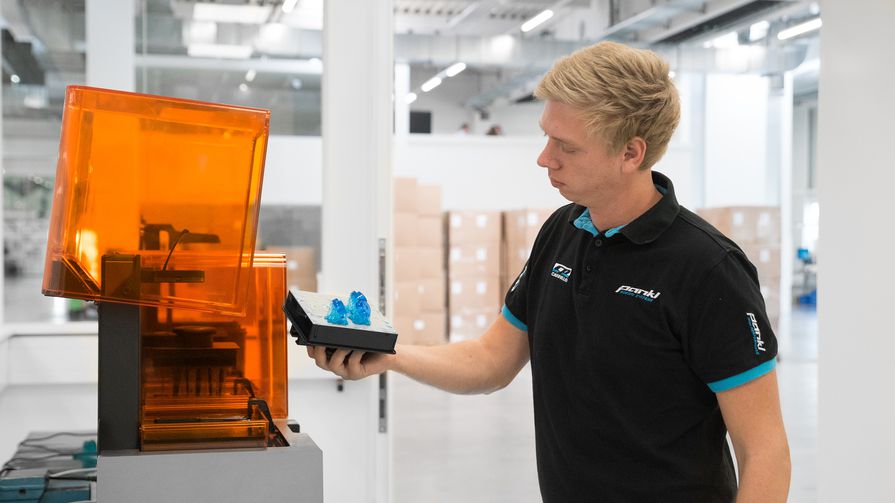
In what cases has 3D printing helped trim production timelines and save costs?
Pankl was selected to manufacture entire gearbox assemblies for a well-known motorcycle manufacturer in 2016, and we swiftly began to set up the new production facility. Manufacturing these gears is an elaborate process. Forged steel parts go through multiple stages of machining using automatic lathes, followed by heat treatment and stress relief.
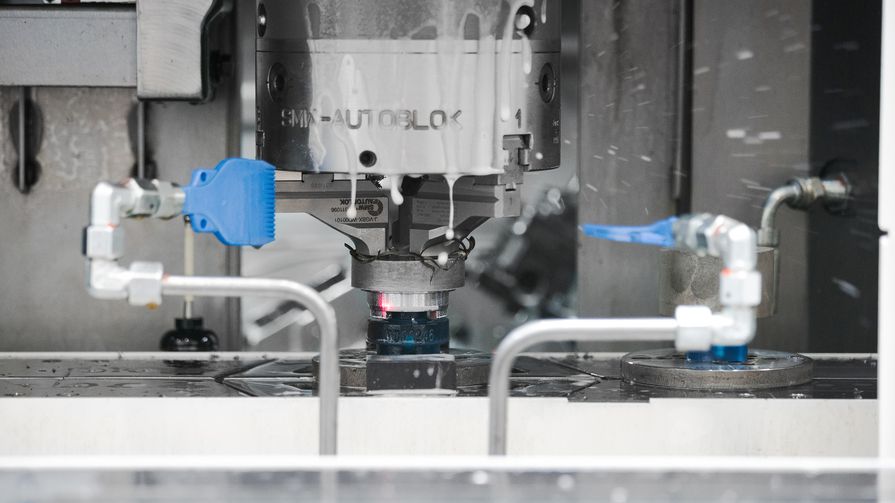
Each stage of turning in the automatic lathes requires custom jigs for every individual gear type. Machining these parts is costly, and adds significant complexity and risk to the manufacturing process.
Our schedule was tight because we had to produce many more gear types than expected. By the time we got to designing and ordering tooling, we were already supposed to start producing the first acceptance lots. We couldn’t just design the custom jigs and get them next day. If we had outsourced to traditional machining service providers, we would have had to wait six more weeks before we could start production–so we decided to produce the parts in-house on our Form 2 3D printers.
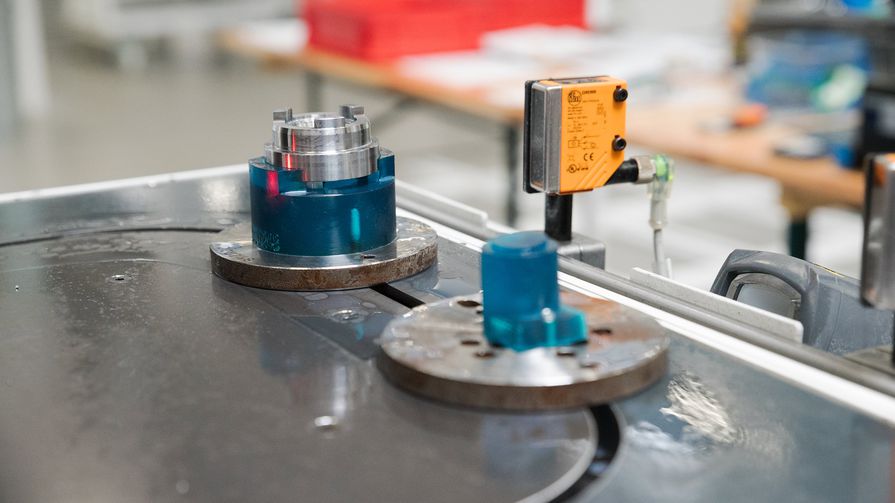
With 3D printing, you can simply take the same design, send it to the printer, and then have the finished part ready by the next morning. This leaves time to check the part on the manufacturing line and make any necessary changes. It also simplified the design process, providing the design freedom to produce jigs in any shape. In conventional CNC milling or turning, you are constrained by the need to design machinable parts, and every extra curve, hole, or chamfer adds complexity to the process.
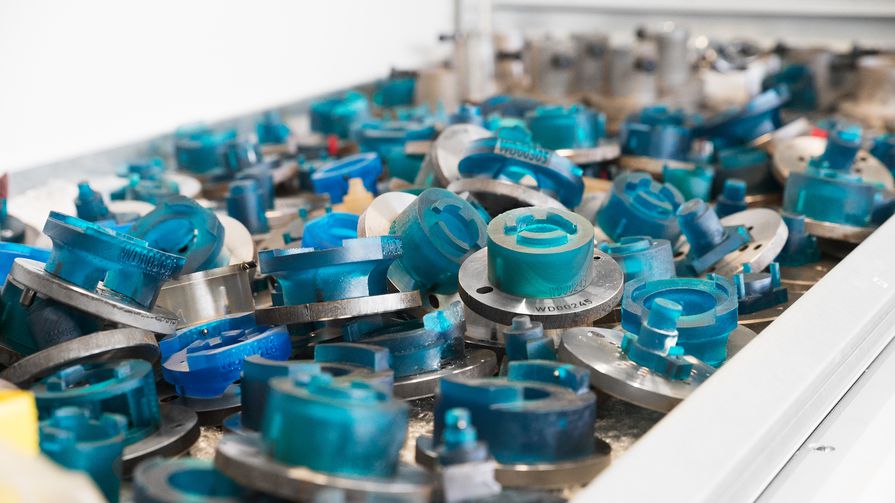
Using a single Form 2, we can print a single jig in 5—9.5 hours, and running all three of our machines enables us to produce about 40 jigs within a week.
A simple machined jig costs about $40—50, but more complex parts can cost up to $300. 3D printing reduces these direct costs to $8.5—25, and significantly lowers overhead costs in design, purchasing, and storage, resulting in more than 90 percent overall cost reduction. Considering we’ll have to produce more than 1,000 jigs over the course of production, 3D printing will help the company save more than $150,000.
How did these parts fare on the production line?
We’ve had lots of problems in the past because the cooling media in the lathe is very aggressive on plastic parts, and makes them brittle after some time. Parts 3D printed with Tough Resin have shown resistance against our cooling media, and they are strong enough to withstand the intermittent load that these parts have to endure. Holes and length tolerances normally lie within the ±0.1 mm interval, which satisfies the requirements for our jigs.
We’ve already produced more than 300 3D printed jigs to manufacture small batches of 200 parts of each gear for the trial production run. Soon, we’ll scale up production to 1,000-2,000 parts per batch and the production capacity of the facility will increase to more than 1.5 million gears per year.
What are some other applications where you have used 3D printing?
Prototyping, shot peening, masking, and manufacturing various jigs and tooling. For example, when we have a new connecting rod design, we 3D print prototypes to discuss complex features on the part. It’s much easier if you can look at the part, and hold it in your hands.
Once we had to design a custom connecting rod for a customer, who wanted to verify if it’d fit into the building room of a cylinder and that it wouldn’t hit the chamber or the cylinder head itself while turning. We 3D printed a prototype and sent it to them. Once they confirmed that the design worked, we could start production with confidence. The alternative would have been to produce a machined part, which would have been more expensive for the customer and required eight weeks of waiting time.
We also 3D printed special adapters for grippers on an automated handling system. To achieve the perfect grip between the gripper and the part, you have to take the negative of the part, and form the fingers of the gripper according to the shape of your part. Normally we would have milled or cast it, which would have been substantially more expensive.
Recently, we used Flexible Resin in a shot peening machine to increase the friction between the self-cleaning jigs and some other parts. The friction between the metal parts was too low to transfer the turning movement. I added some 3D printed elastic brakes in the tooling to increase the friction so that the turning movement was transmitted from the bottom to the top. Getting these parts from an external vendor would have taken weeks.
Do you have any other plans to use 3D printing within Pankl?
One of my goals is to get more orders from other divisions within Pankl. We’ve had success with 3D printed parts in our production line, and I see countless other applications that could benefit from 3D printing. I want to show other engineers the parts we make, and the applications where we use them, to make them aware that this technology is available to them in-house.
I started with this project when other colleagues showed interest in our new processes. I sent around information on the 3D printing materials, such as their mechanical properties, what they look like, and the particular use cases they’re suitable for. I also printed sample parts for other departments, described the design specifications and how they can order something.
SEE WHAT YOU CAN CREATE WITH A FORM 2
Explore the materials to discover the one that fits your needs.
Request a Free Sample
We’ve already printed parts for aerospace and drivetrain divisions. They send us the designs, we produce the parts for them, and they receive finished parts that are ready to use in their machines. Pankl is a large company, though, which makes this a slow process. We have to overcome the same hurdles as we did initially within our department, and I believe many other companies have these concerns about 3D printing.. But looking at the results we’ve achieved, I’m positive that they’ll recognize the value in the technology.